
Taking an ice bath can provide incredible benefits, from reducing inflammation to improving mental clarity, but regularly plunging into icy waters requires some preparation and planning. This comprehensive guide will equip you with everything you need to start your own consistent and safe ice bath routine.
We’ll start by outlining the various vessel options for your frosty endeavor —from standard bathtubs to durable stock tanks or even luxury cold plunge tubs with high-end features. You’ll learn the advantages of each to select your ideal icy oasis aligned with your space, budget, and preferences.
Next, we’ll cover how to achieve and maintain the recommended temperature, whether by manually adding ice or leveraging convenient electric water chillers for precision and efficiency. You’ll get tips for preparing both your mindset and body before taking the actual plunge so you can slowly acclimate to the cold.
The step-by-step process for your ice bath session will ensure you dip safely, and then properly recover afterward with rehydration, gentle movement, and complementary wellness practices. Finally, you’ll discover how to steadily build an effective ice bath regimen by setting incremental goals, tracking progress, and listening to bodily feedback.
Whether you’re a stone-cold newbie or an avid cold connoisseur, by the end of this guide you’ll be equipped to make icy immersion an invigorating part of your routine.
Let’s dive in!
Step 1: Choosing Your Ice Bath
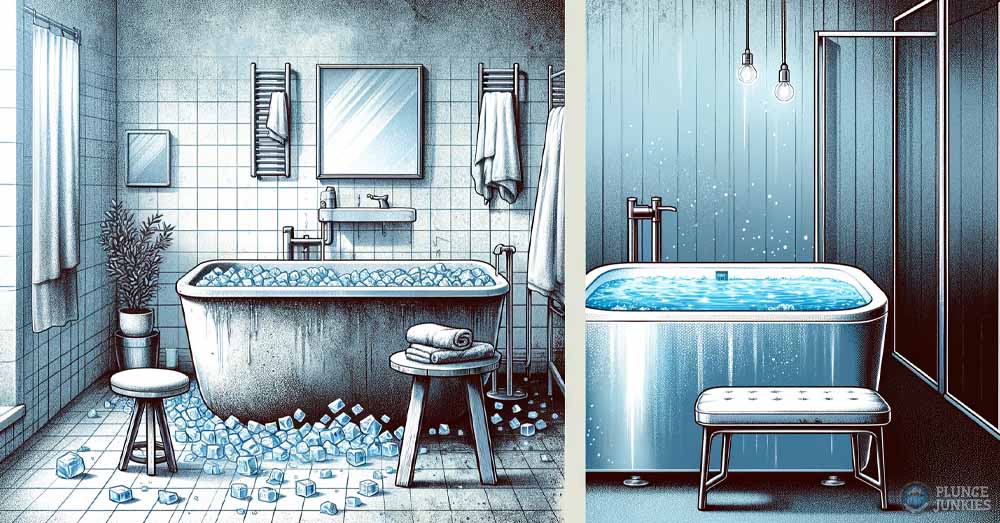
The first step to taking your first ice bath is to determine what icy vessel you want to use. This can be as straightforward and cost-effective as using your own bath tub, to engaging in a DIY project to create a specialized ice bath tub, or even investing in a high-end, fully-equipped unit complete with all the desired features.
Let’s cover some of the common options, (outlining the advantages and disadvantages of each) to assist you in finding the setup that aligns perfectly with your preferences and budget.
Using Your Bathtub
Turning your home’s bathtub into a cold plunge bath is an approachable and budget-friendly method for those curious about starting their journey into the world of cold therapy without immediately investing in specialized gear. It’s a straightforward solution, leveraging something you already own to explore the benefits of this invigorating practice.
Most standard bathtubs are designed to accommodate the average person comfortably, allowing for the lower body to be fully submerged while seated.
Yet, the path of using your bathtub for regular cold plunging is not without its hurdles. The process of setting up for a cold plunge—cleaning the tub, filling it with water, adding sufficient ice to reach the desired temperature, and then draining it afterward—demands time and effort. This commitment can make the practice daunting, especially considering the physical and mental challenge of immersing oneself in ice-cold water. The ease of procrastination increases with the effort required for preparation and cleanup.
Additionally, the size and shape of your bathtub may restrict full-body immersion for taller individuals or those seeking a more spacious environment for their cold plunge.
Even with its drawbacks, your regular tub is a solid place to kick off your ice bath. However, for those looking to seriously integrate this practice into their wellness routine, exploring dedicated cold plunge tub options—which can be surprisingly affordable—might be a worthwhile consideration.
Inflatable & Portable Ice Baths
If you’re looking for a budget-friendly option, an inflatable or portable cold plunge tub might be right up your alley. With their affordability (typically between $100 and $150), these tubs stand out as accessible options for beginners.
Unlike using your regular bathtub, having a tub specifically for cold plunges can greatly reduce the mental barrier to regular use. It’s always ready for you, eliminating the repetitive setup and cleanup process.
These tubs can be quickly inflated, filled with cold water, and then enhanced with ice, requiring minimal effort and preparation time. They are especially beneficial for individuals with limited space or those who prefer the flexibility of moving their cold plunge setup to different locations. Unlike permanent installations, an inflatable tub can be easily stored away when not in use.
But keep in mind, if you’re using these inflatable tubs a lot, they might not hold up as well over time. Just like anything you buy, the quality and features of inflatable pods reflect their price—don’t expect top-notch durability and warmth if you’re not shelling out more cash.
- The Cold Pod: A solid option in this category that is durable and affordable.
Also, they may not be as effective at maintaining the desired water temperature due to less insulation compared to more permanent setups. You can, however, opt for more expensive versions running up to about $1000 that are more insulated and include ports for water chillers. For someone starting their journey into regular ice baths, an inflatable tub offers a practical middle ground between convenience and commitment.
Stock Tank
For those seeking a durable and permanent outdoor ice bath setup, a stock tank offers a compelling and affordable solution. Typically priced around $200, these rugged containers are constructed from either heavy-duty plastic or metal to withstand repeated cold water dunking and placement in external environments.
Stock tanks shine for their resilience against cracking or deformation even with regular plunge sessions amid winter’s frigid air. Plus, their simple design means these vessels are more affordable than high-end alternatives while still delivering ample space for full-body immersion critical for reaping all cold therapy benefits.
Unlike inflatable options, stock tanks remain firmly planted wherever you install them. While this permanence provides stability, it does limit mobility should you need to reclaim the space down the road. Their industrial aesthetic also clashes with most backyard decor.
However, handy homeowners can customize a stock tank’s appearance and functionality over time through creative modifications and add-ons like insulation, filtration systems, or chillers tailored to your budget and needs. So while off-the-shelf stock tanks demand more upkeep to maintain clean, crisp water, their blank-canvas potential enables you to transform them into a custom cold plunge sanctuary.
For committed cold therapy devotees with the outdoor area, stock tanks present an opportunity to construct a personalized ice bath hub resilient enough for daily winter warrior wellness.
Premium Cold Plunge Tubs
For enthusiasts who have made ice bathing a regular part of their wellness or recovery routine, investing in a dedicated cold plunge tub can significantly enhance the experience. These purchased ice bath tubs stand out for their convenience, advanced features, and reliability, providing a seamless cold plunge experience with minimal setup. Designed for durability, these units often come equipped with built-in chillers, filtration systems, and other sophisticated features that ensure a precise and consistent cold bathing experience.
Despite their appeal, these tubs represent a considerable financial commitment, with prices ranging from $4000 to upwards of $20,000 for the most luxurious models. The investment reflects the level of technology and convenience offered, catering to those who prioritize quality and performance in their cold therapy practice. Additionally, the physical footprint of these tubs necessitates dedicated space within a home or facility, which may not be versatile for other uses.
Among the available options on the market, two models have distinguished themselves:
- Aquavoss Model 1: Hailed as the best cold plunge tub of 2024, it strikes a balance between affordability and luxury. With industry-leading insulation, a water chiller, filter, ozone treatment, and a water circulator, it’s a comprehensive choice for both novices and seasoned cold plungers.
- King Kool: Slightly more expensive, this model is glorified for its robust build quality. It also features good insulation, a water chiller, filter, ozone treatment, and a water circulator, offering a formidable alternative to those willing to invest a bit more for added durability.
One of the trade-offs of opting for a purchased ice tub is the limited opportunity for customization. While these units are equipped with state-of-the-art features for temperature control, water purification, and circulation, they offer less flexibility than a DIY approach where every component can be tailored to individual preferences. However, for many, the benefits of having a professional-grade tub with customer support and warranties far outweigh the desire for customization.
Step 2: Controlling Ice Bath Temperature

Once you’ve selected your ideal ice bath, it’s now time to talk about temperature. An optimal ice bath temperature should be between 50-59°F (10-15°C). While this ideal range is where you will find the majority of the benefits, you can certainly choose to go much colder.
Achieving and maintaining the right temperature can be managed in various ways. Here’s how you can effectively control the temperature of your ice bath.
Using Ice
The most straightforward method is to fill your tub with cold water and add ice. But how much ice should you add? As a rule of thumb, you’ll want to at least use a 3:1 ratio of water to ice. This means that for every four parts of water, you should add one part of ice.
| Volume of Water | Amount of Ice Needed |
|---|---|
| 70 gallons | 180 lbs |
| 100 gallons | 257 lbs |
| 120 gallons | 308 lbs |
You might notice from the table above, that is a lot of ice. However, these are estimates and various factors will affect the exact amount of ice you’ll need for your tub. If you decide to go the ice route I would highly recommend reading our guide How Much Ice for an Ice Bath which covers the factors that affect ice quantity as well as providing a calculator to help you get an accurate ice estimate for your specific needs.
Next, let’s talk about the biggest challenge with ice—consistently producing enough of it. You can buy it, but that cost can add up quickly, and not to mention, who wants to keep running to the store before every ice bath?
But fear not icy warriors, there are ways to mass produce cheap ice, which we have a full guide here: How to Make Lots of Ice for Ice Baths.
Water Chiller
For those seeking a more technologically advanced and convenient solution to achieving the perfect ice bath, water chillers present an appealing alternative. Unlike the traditional method of manually adding ice to water, chillers offer precise temperature control, allowing you to set and maintain the exact degree you desire for your bath.
Benefits of Water Chillers Over Ice
- Precision and Control: Water chillers provide exact temperature settings, which means you can achieve your desired water temperature quickly and keep it consistent throughout your bath, without the guesswork of measuring ice.
- Convenience and Efficiency: With a water chiller, the need for ice procurement or production is eliminated. This not only saves time but also reduces the physical effort of handling large quantities of ice.
- Long-Term Savings: Although the initial investment in a water chiller may be higher than buying ice, over time, the cost efficiency becomes apparent as the recurring expense and effort of acquiring ice are removed.
- Cleanliness and Filtration: Many water chillers come equipped with filters, providing an excellent way to keep your ice bath clean and hygienic.
Here at Plunge Junkies, we know the value that water chillers bring to the plunge tub. That’s why we offer the most extensive collection of water chillers online, suitable for every need and preference. On our water chiller collection page, you’ll find devices of various models, specifications, and features.
Plus, our handy calculator (at the bottom of the page) is designed to help you find a chiller that’s powerful enough for your specific setup. Just input your tub size and desired temperature, and the calculator will suggest the ideal chiller for you.
Using Outdoor Temperature and Overfreezing Issues
In colder climates, you may leverage the outdoor temperature to cool your ice bath without a chiller. During winter months, nature does half the job for you. However, watch out for overfreezing problems. If the mercury dips too low your ice bath becomes an ice block, which can make it unusable. To prevent your ice bath from overfreezing, consider using something like a pond heater (just be sure to unplug it before using your tub).
Step 3: Taking Your First Ice Bath

Preparing For Entry
Before you take your first ice bath, it’s important to prepare both mentally and physically. Start by understanding how your body reacts to cold by taking cold showers until you can work up two a 2-3 minutes. You can skip this step, but it starting with cold showers will significantly help you during your first ice bath.
When it’s finally time to take your first ice bath, take a moment to prepare your mind and body with breathing exercises. Practice three rounds of 30 deep breaths followed by a hold. This helps in relaxing and controlling your breath. When you’re ready to take the plunge, fill your bathtub with cold water and add ice until you reach a temperature of around 50-59°F (10-15°C). For your first ice bath, consider starting with a slightly higher temperature and gradually lowering it as you grow more comfortable.
The Ice Bath Experience
Ease yourself into the ice bath slowly, allowing your body to acclimate to the cold. Start with your lower body, and then gradually submerge your upper body. Remember to remain calm and keep breathing. For your first ice bath, aim to stay submerged for 1-2 minutes. Gradually increase your time in the ice bath as you become more comfortable. Listen to your body and exit the bath if you experience any discomfort or pain. If you’re a beginner, limit your time in the ice bath to between 1 and 5 minutes maximum, then work your way up. If you feel dizzy, are extremely uncomfortable, start excessively shivering, or otherwise feel unwell during your ice bath, get out slowly but immediately.
Post-Ice Bath Process
After your ice bath, resist the urge to jump into a hot shower immediately. Instead, focus on warming up naturally to reduce the risk of any adverse reactions. Dress in warm clothing, wrap yourself in a blanket, or sip on a hot decaffeinated beverage. This gradual process helps your body adjust smoothly
Next, rehydrating is key. Your body loses fluids and essential electrolytes during the cold immersion, so it’s important to replenish these as soon as possible. Opt for water or fluids rich in electrolytes to restore fluid balance.
Incorporate light stretching, walking, or yoga after your ice bath. These gentle movements promote blood flow, aiding in the removal of metabolic waste and facilitating muscle recovery. It’s crucial, however, to wait at least 30 minutes before engaging in any heavy stretching or exercises to allow your muscles to recover adequately from the cold.
Remember, every person has a different tolerance to cold, so listen to your body and adjust your recovery routine accordingly.
Step 4: How to Build an Ice Bath Routine

Building an ice bath routine requires consistency, gradual challenge, and clear goals. Here are six critical points to internalize that will help you establish a safe and effective ice bath routine.
- Set Clear Goals: Motivation can be maintained by setting clear, achievable goals. Start with short-term objectives, such as extending the ice bath duration by a few minutes over several weeks. Long-term goals could focus on enduring colder temperatures or incorporating ice baths into a broader wellness or training program. These goals should be challenging yet attainable, providing a sense of accomplishment as you progress.
- Establishing Consistency: The key to benefiting from ice baths is regular practice. Start with shorter sessions of around 1-2 minutes in slightly cold water, and integrate these into your routine 2-3 times a week. This regularity helps acclimate your body to the cold and builds mental discipline.
- Slowly Challenging Yourself: As your tolerance improves, gradually increase the ice bath duration and decrease the water temperature. A good rule of thumb is to extend the time by 30 seconds and introduce more ice as you feel comfortable. Always prioritize safety and listen to your body, distinguishing between the natural discomfort of cold exposure and any signs of distress.
- Monitoring Progress and Making Adjustments: Documenting your ice bath routine can offer insights into your progress and how your body adapts over time. Note the duration, temperature, and how you felt during and after each session. Use this journal to adjust your approach, perhaps increasing the challenge or scaling back if necessary.
- Incorporating Recovery and Complementary Practices: Recovery is as important as the ice bath itself. Include warm-up exercises before and gentle stretching after your ice bath. Breathing exercises and meditation can also enhance the benefits of cold exposure, helping to control the body’s response to stress and discomfort.
- Listen to Your Body: Pay close attention to bodily signals and any discomfort. Work within your physical limits, and don’t push excessively fast or far. Over-stressing your body can result in injuries or dangerous health consequences. Adapt your routine to your body’s feedback.


